How Do I Create a Sub-Account?
Sub-accounts are great way to keep links organized. Here is how to make them.
In your IDS account, on the left side of the screen, make sure you have the correct account highlighted to create a sub account under.
.png?width=206&name=Accounts-edited%20(1).png)

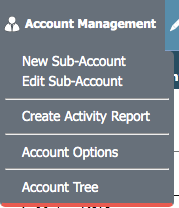 From the top bar, click on "Account Management". On the menu that appears, click on "New Sub-Account"
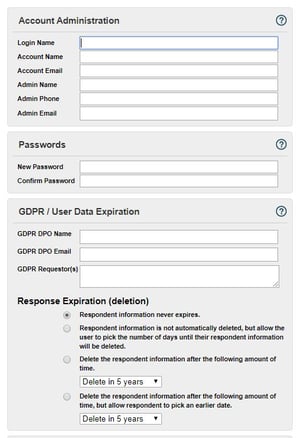
Starting on the left side of the page you will see the following sections.
The Login Name must be one word (no spaces), probably best as an abbreviation of the client's name.
The Account Name can be anything, usually the company name, or the name of the administrator of the account.
The Account Email should be your email address.
All Admin info should be either your information, or the information of the person managing the account.
The password must be filled out, there is no limit.
GDPR information can be found here.
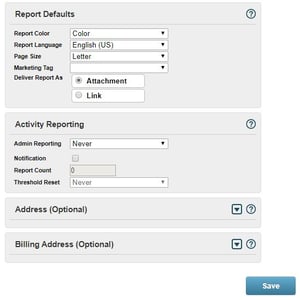
Review the report defaults, they are set to our recommended settings.
Activity reporting creates a scheduled email detailing what reports were created on this sub-account in the specified time frame.
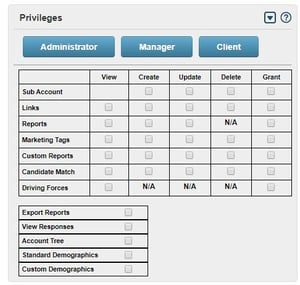
On the right side of the window you will see the following sections.
By clicking the arrow in the box, you can expand the "Privileges" section to look like the image.
The three buttons are presets that you can customize by checking or un-checking the box.
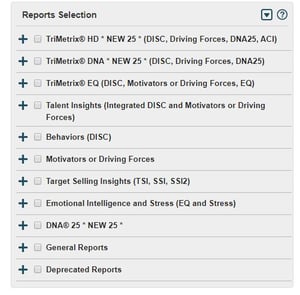
The final section will allow you to select the reports you want this account to be able to use.
Once you have made your selections, click save at the bottom.
If you have any questions, or if something does not work, please reach out to our Partner Support Team member by clicking the chat button in the lower right corner, or call us at (800) 869-6908. We will be happy to help.